
First a big thank you to HighSpeed PC for providing the Tech Station for this Review.
A few months ago I was doing some browsing around on the web and I come across this Tech Station from HighSpeed PC. After looking at it on the web site for a while I decided to see if they would send me one for Review and they did, so here is my Review.
The reason why you would want something like the Tech Station is, it makes it super easy to test/upgrade your hardware do to the fact you can simply slide things in and out of the tech station and not have the hassle you would have with a conventional type of computer case.
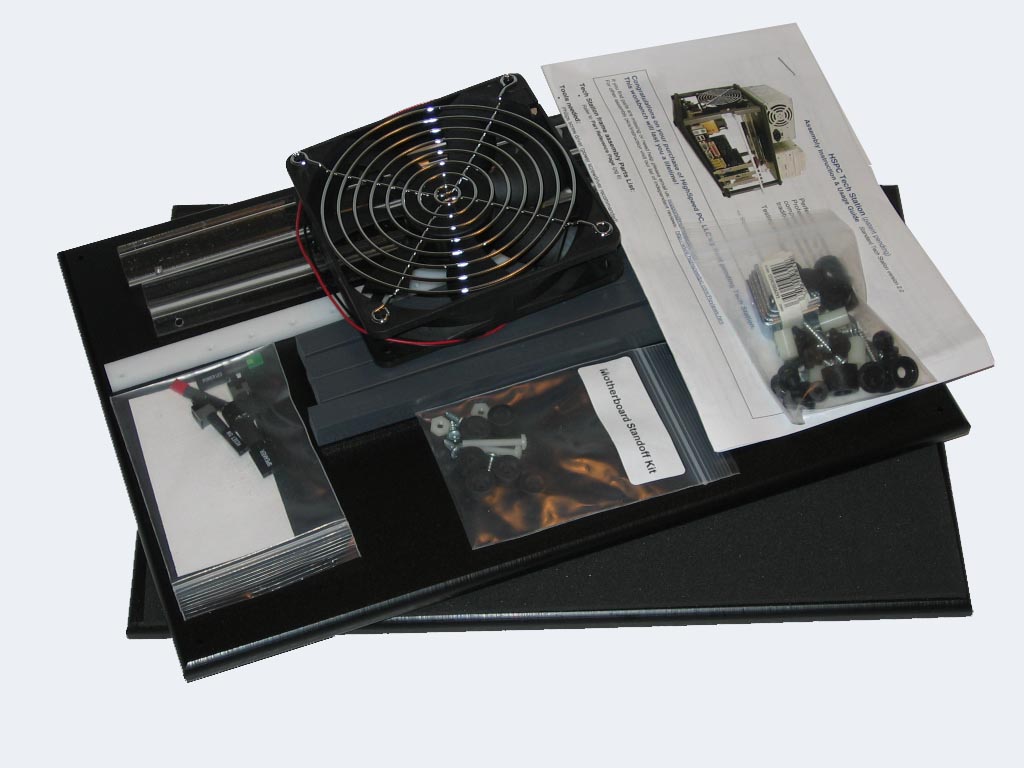
When I finally did get the Tech Station for Review I quickly unpacked it and began to set it up. In the above picture you can see the Tech Station in it’s unassembled form.
The only thing I needed to assemble the Tech Station was a #2 phillips screw driver and that was it. For the most part the documentation that come with the Tech Station was easy to follow, and to be honest you don’t even really need to read the documentation to get the Tech Station built its all pretty straight forward.
The entire time to build should have been around about the 30 minute mark but I run into a issue with my Tech Station. One of the legs that hold the top up was not drilled out so that you could attach the L bracket and then attach the PCI/AGP rail. This rail is what you use to screw the PCI/AGP cards down onto and it keeps the cards from moving around.
So after a few minutes of hunting around here I finally got the drill out and drilled the hole that should have been there in the first place. This was not that big of a deal but if you didn’t have a drill handy it would have certainly halted building the Tech Station.

While putting the Tech Station together I noticed the spots where the nylon screws and nuts go to hold the mother board down seem to be off. The screw that holds the top of the motherboard down is way to close to the edge of the wood. In the picture above if you look at the top yellow arrow you can clearly see the head of the screw sticking out past the bottom edge of the Tech Station.
In the same picture above if you look at the second arrow down you can see a black rubber stand off the motherboard rests on. The problem once again it looks like the hole for the standoff was drilled to close to the edge of the wood and the black rubber stand off is also hanging over the edge.
These are not huge deals to me but they are worth noting and they do make it look like someone was pretty sloppy when drilling the holes and making sure things were lined up right before drilling began.
On another note my 633 mhz celeron motherboard that I use once in a while wouldn’t even line up with the two nylon screws that are used to hold the motherboard in place. Its not critical that you have the motherboard screwed down but it would be nice if they made it so the Tech Station had more options in terms of how to mount the motherboard down. For example it would be nice if they made the bottom piece of the Tech Station have the same holes you would see inside a computer case so that you could mount any ATX motherboard to the bottom of the Tech Station and use proper hardware such as the brass stand offs and screws you normally get when you have a normal computer case.
What I don’t really understand is why the people who made the Tech Station decided to use nylon screws and nuts. It don’t seem to me like it would take much to strip any of these things if you tighten them to much. I would have been much happier if they would of used normal steel screws and nuts. It would also be nice if the PCI/AGP rail was made from steel as well.
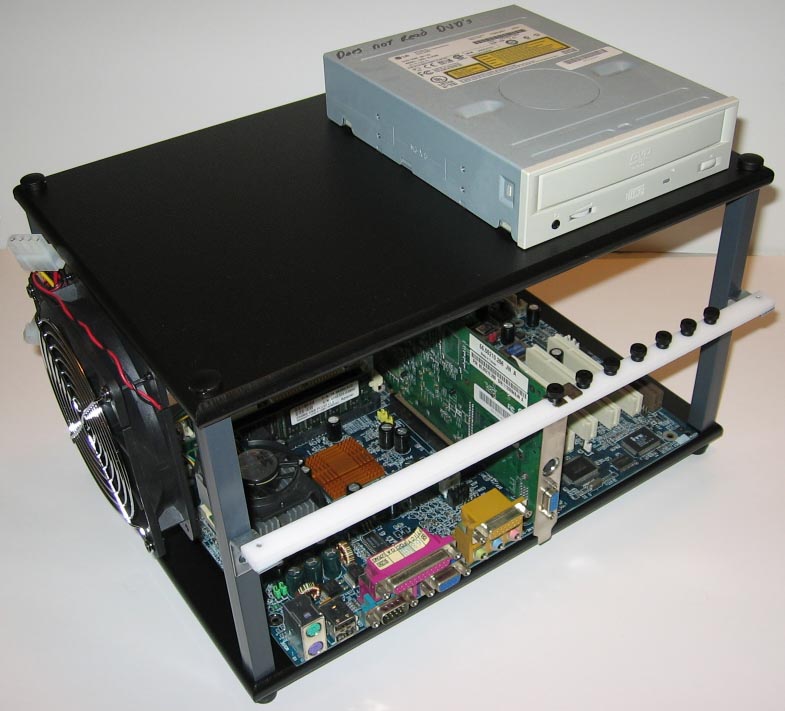
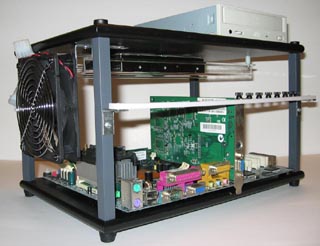
Despite these issues once you actually get the Tech Station together its not bad looking at all. You can see in the picture that there is a big 120 mm fan that can get some air flow moving around which is good, you don’t want to have any heat build up. There is also more then enough room beside the CDROM drive for a power supply.
The top and bottom of the Tech Station are made from what feels like press board they are pretty heavy for their size and I suspect they would last quite a while. I also like that black finish on them as well.
The biggest plus to this Tech Station is how easy it is to move stuff in and out you can slide a mother board with all the PCI cards plugged in no problem at all. The other benefit to this open air design is that you can clean things really fast. You could take the whole thing out side with a motherboard in place and with some compressed air get rid of any dust in no time.
You can also purchase some leds and some switches from HighSpeed PC that are used for turning the motherboard on and off and also seeing if the power and hard drive are active. You also get a small speaker you can hook up to the motherboard as well in case you need to here beep codes.
In conclusion I like the Tech Station, as mentioned above it does have some small problems I would like to see addressed but over all it does what its supposed to. At the time of this article you could get the Standard Tech Station for about $80.00 U.S and the switches and the leds cost about $15.00 U.S.
WolfManz611..
