
First a big thank you to Presonus for providing the AudioBox 2 X 2 USB Recording System for this Review.
It’s been quite a while now since I’ve done a Review on an audio interface and so with that in mind, today I take a look at the Presonus AudioBox 2 X 2 USB Recording System to see what all it has to offer and what exactly makes it a good recording system.
Before I get too far into this Review I should mention the System Requirements and Specifications for the AudioBox USB as well as the computer specs of the machine used to test the hardware and software.
System Requirements
MAC OS© X 10.6.8 OR HIGHER
Hardware Minimum
-Intel© Core™ Duo processor
-2 GB RAM
Hardware Recommended
-Intel Core 2 Duo or Intel Xeon© processor or better
-4 GB RAM
WINDOWS© XP, VISTA©, 7 (32- OR 64-BIT)
Hardware Minimum
-Intel Core Duo or AMD Athlon© X2 processor
-2 GB RAM
Hardware Recommended
-Intel Core 2 Quad or AMD Athlon X4 or better
-4 GB RAM
OTHER REQUIREMENTS
-Internet connection (not required on machine where Studio One is installed but needed for activation)
-DVD-ROM drive
-A monitor resolution no lower than 1280 x 768 pixels
-20 GB hard-drive space
Specifications
Microphone Preamp
-Type XLR Female Balanced
-Frequency Response (±3.0 dB) 14 Hz to 70 kHz
-Input Impedance (Balanced) 1200 ?
-THD+N (unwtd, 1 kHz @ +4 dBu Output, Unity Gain) < 0.008%
-EIN (A-weighted, 55dB Gain, 150 ? Input, 20Hz to 22 kHz) -115 dBu
-S/N Ratio (Unity Gain, Ref. = +4 dBu, 20Hz to 22 kHz) > 95 dB
-Common Mode Rejection Ratio (1 kHz, 55 dB Gain) > 45 dB
-Gain Control Range (± 1dB) 0 dB to 35 dB
-Max Input Level (Unity Gain, 1 kHz @ 0.5% THD+N) -3 dBu
-Phantom Power (±2 VDC) +48 VDC
Instrument Input
-Type ¼"
-TRS Female Unbalanced Input Impedance 0.5 M ?
Line Outputs
-Type ¼" TRS
-Balanced Output Impedance 51 ?
Headphone Output
-Type ¼" TRS Active Stereo
-Maximum Output 60 mW/Ch @ 60 ? Load
-Frequency Response (±1.0 dB) 20 Hz - 30 kHz
MIDI I/O
-Type Dual 5-pin Female DIN
Digital Audio
-ADC Dynamic Range (Awtd, 48 kHz Sample Rate) 102 dB
-DAC Dynamic Range (Awtd, 48 kHz Sample Rate) 110 dB
-Bit Depth 24
-Reference Level for 0dBFS +4 dBu
-Internal Sample Frequency Selections (kHz) 44.1, 48
-Power USB Bus-powered
Physical
Main Chassis
-Package Type 1/3U - steel chassis
-Dimensions 5.5(W) X 5.5(H) X 1.75(D) inches
-Weight 5.0lbs
Computer used for testing the hardware / software had the following specs
-XFX Black Edition GTX 260 896 Meg 216 Core Video Card
-Asus Crosshair IV Formula Motherboard
-AMD Phenom II X6 1090T Processor @ 3.21Ghz
-8 Gigs or DDR 3 Ram
-1 Crucial C300 SSD Drive 256GB
-3 Sata 7200 Rpm Hard Drives 2 250GB Drives and 1 500GB Drive
-1 LG DVD / CD Burner
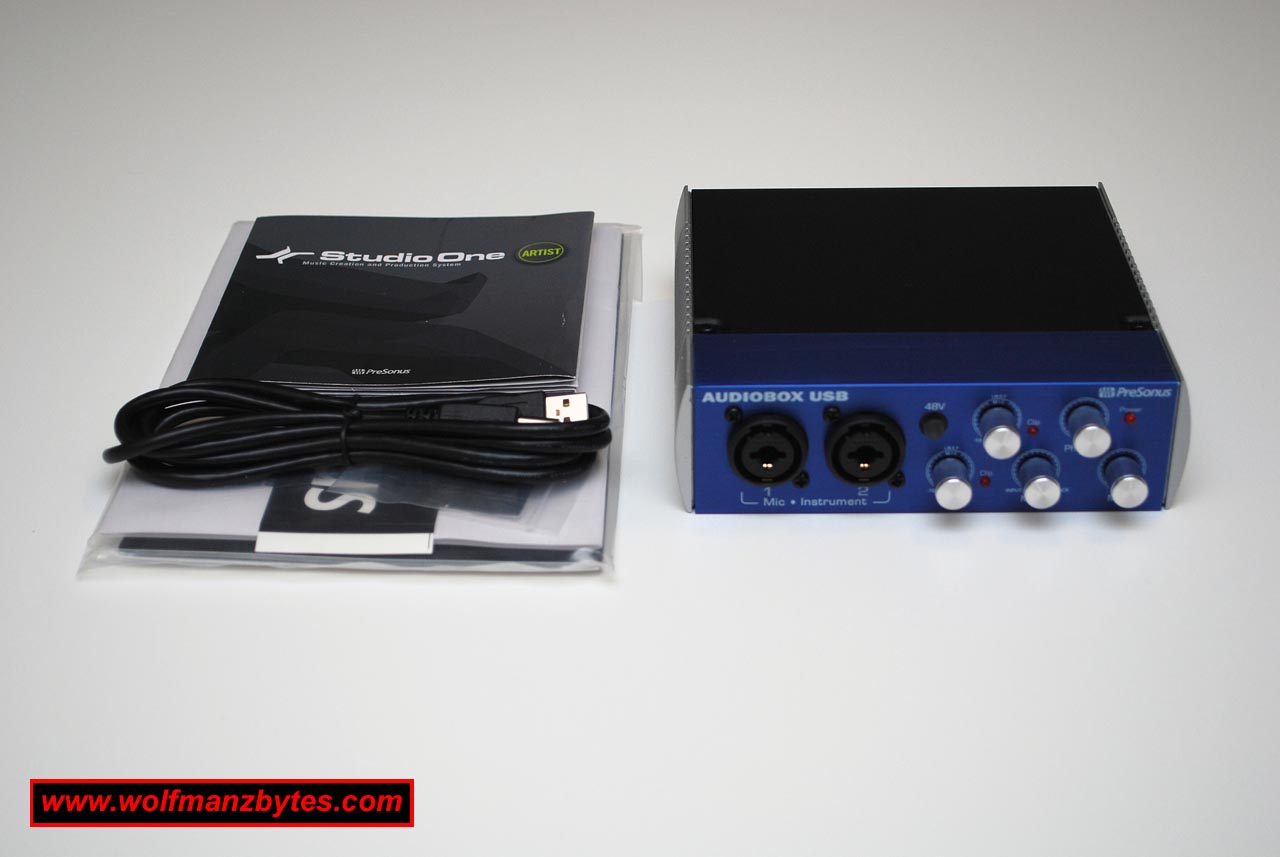
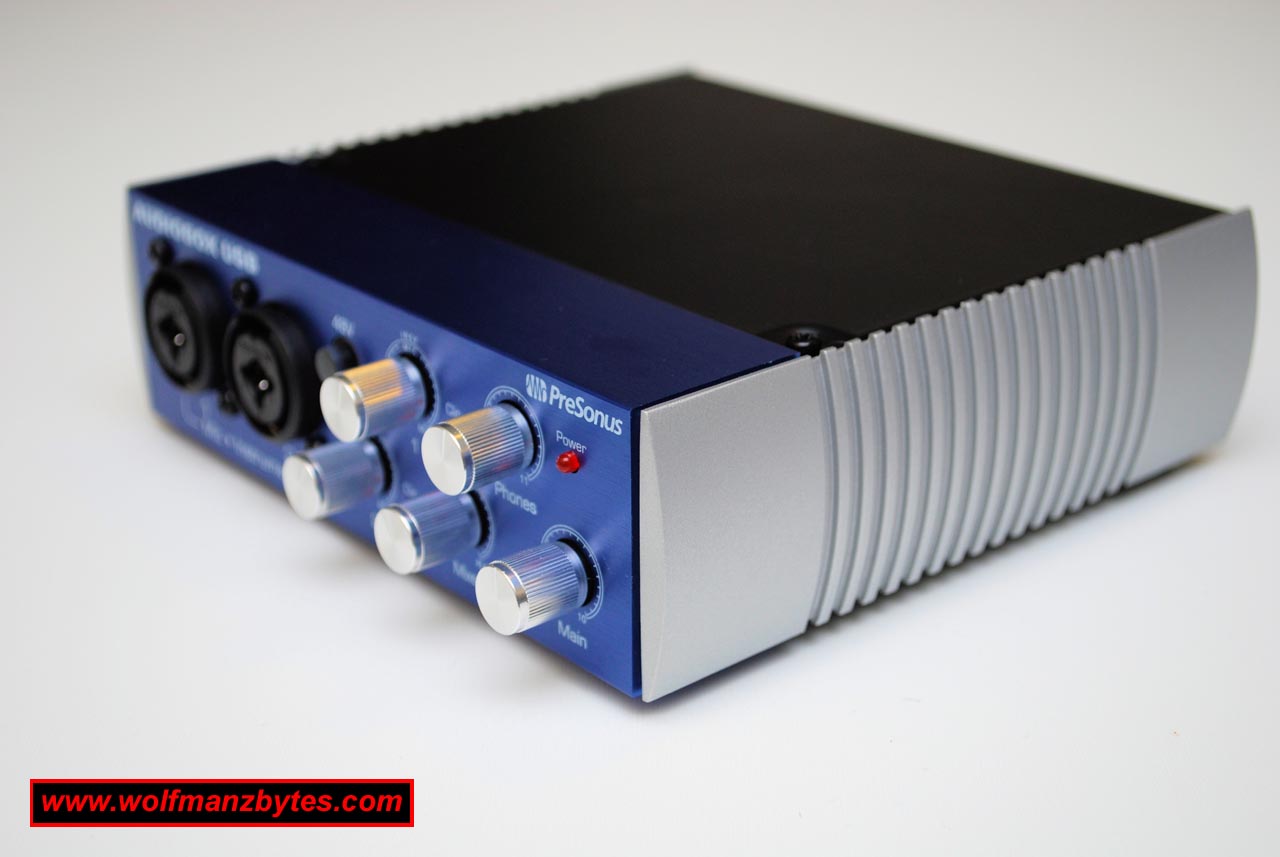
The first thing I noticed about the AudioBox USB was the fact the box it come in was sort of heavy, after ripping the box open I soon found out why. The AudioBox USB is made with an all metal housing and this makes it fairly durable and should stand up to the rigors of traveling should you want to bring it on the road with you.
As you can see in the picture below, once you get everything out of the box that the AudioBox USB comes in you have the following items, the AudioBox USB as well as fairly long USB chord (6 feet) to hook the AudioBox USB to your computer and then you also have the DVD that contains the Studio One Artist V2 software. There is also an AudioBox USB Users Manual and that will give you information on how to get the AudioBox USB up and running.
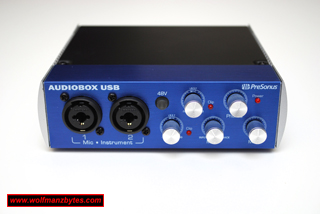
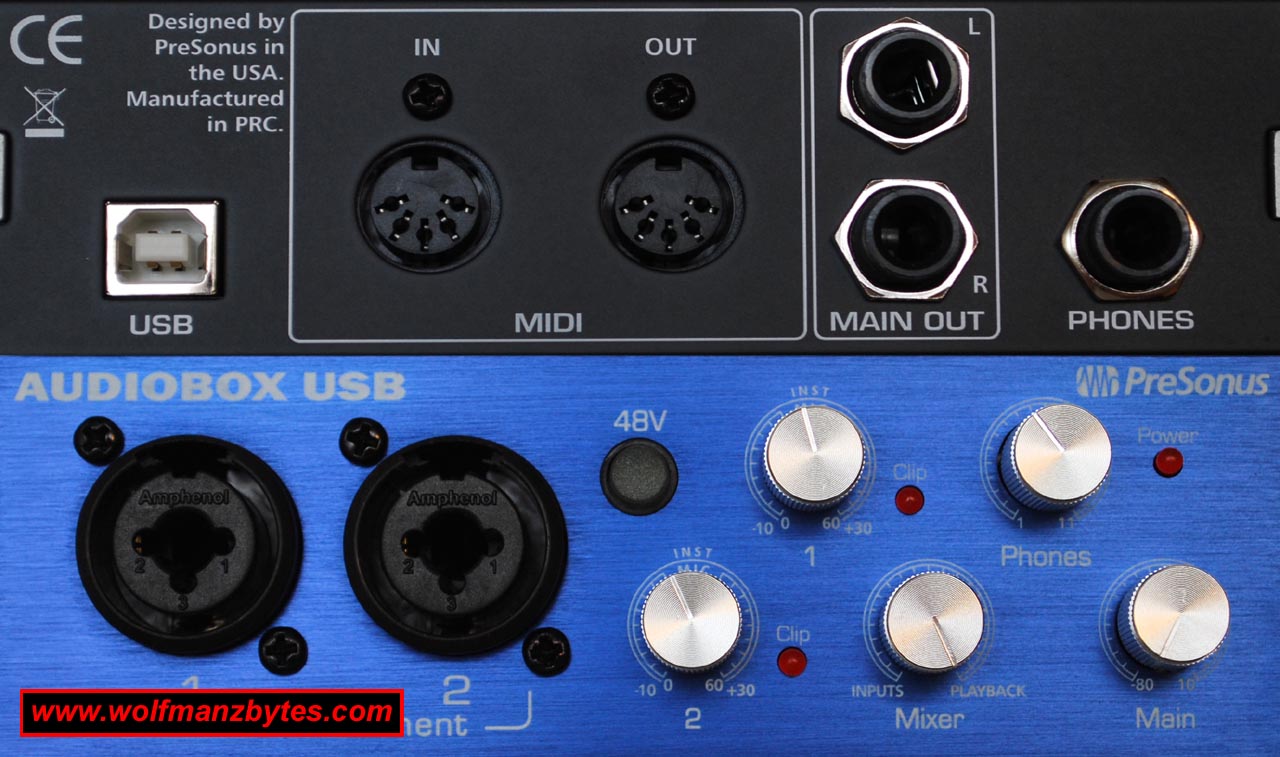
When looking at the AudioBox USB from the front as shown in the picture below you can see the various inputs and controls. Starting from left to right you have 2 XLR / quarter Inch inputs as well as 48 volt phantom power on/off switch. The next thing you see is the 2 Instrument / mic gain knobs and then the clipping lights for input 1 and 2, the next 3 knobs are for your Mixer / Phones / Main Volume knobs and then the power light.
All the controls on the front of the AudioBox USB are pretty much self explanatory in terms of what they do the only one that needs a bit of explaining to those who may not know is the Mixer knob. The mixer knob allows you control how much of the live signal you hear as opposed to the signal that’s being sent from the AudioBox USB to the computer and then from the computer back to the AudioBox USB via a program like Studio One Artist V2. So if for example you wanted to hear a reverb effect that’s been applied to input 1 on the AudioBox USB using Studio One Artist V2 you would have the mixer knob set all the way over to the right so you could only hear the playback from Studio One Artist V2. If you didn’t want to hear the playback from Studio One Artist V2 and just wanted to hear the live signal coming into input 1 then you would just turn the mixer knob all the way to the left to listen to the input directly.

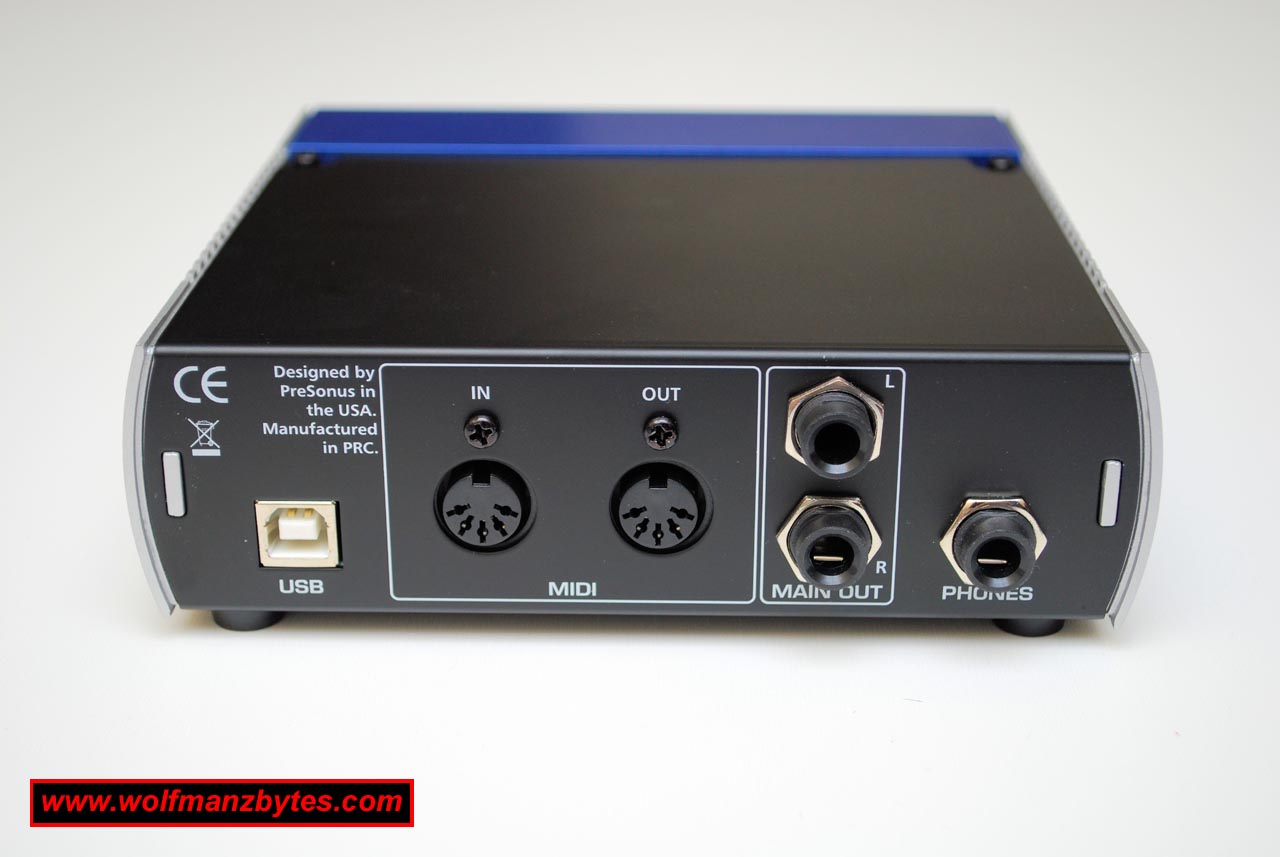
The next picture shows the back of the AudioBox USB and like the front the back is also very straight forward. From left to right you have the USB connector and then the Midi In/Out connections as well as the Main left and right outs and then the headphone jack.
For those wondering where the power jack is, the AudioBox USB is a “bus powered” device meaning it’s powered by your computers USB port and there for it doesn’t require a bulky power adapter to lug around with you and that’s a good thing.
While using the AudioBox USB I did notice a few things missing that I would have loved to have seen added to it. The first and obvious thing was the AudioBox USB is lacking any sort of pad switches for either of the two inputs. Pad switches enable you to reduce the level of an incoming signal buy a set amount like 20db and this is really useful. Without the Pad switches you can end up with a hot signal coming into the AudioBox USB and no way to deal with it.
The next thing I would have liked to have seen added to the AudioBox USB would be a way to control the phantom power on an individual input basis. Right now with the AudioBox USB you have a single phantom power switch that when enabled puts phantom power across both XLR inputs 1 and 2. This isn’t a problem if you’re dealing with two condenser microphones that require phantom power but what do you do when you have a condenser microphone and dynamic microphone that doesn’t require phantom power?
As it turns out certain microphones such as ribbon microphones can be damaged by phantom power and also certain dynamic mics can also be damaged by phantom power as well so this is somewhat of a problem. I have read and been told that a lot of the newer dynamic mics are built to withstand phantom power being fed to them and they won’t get damaged. The best way to find out if your dynamic mic can handle phantom power is to contact your mic manufacturer and see what they say about it.
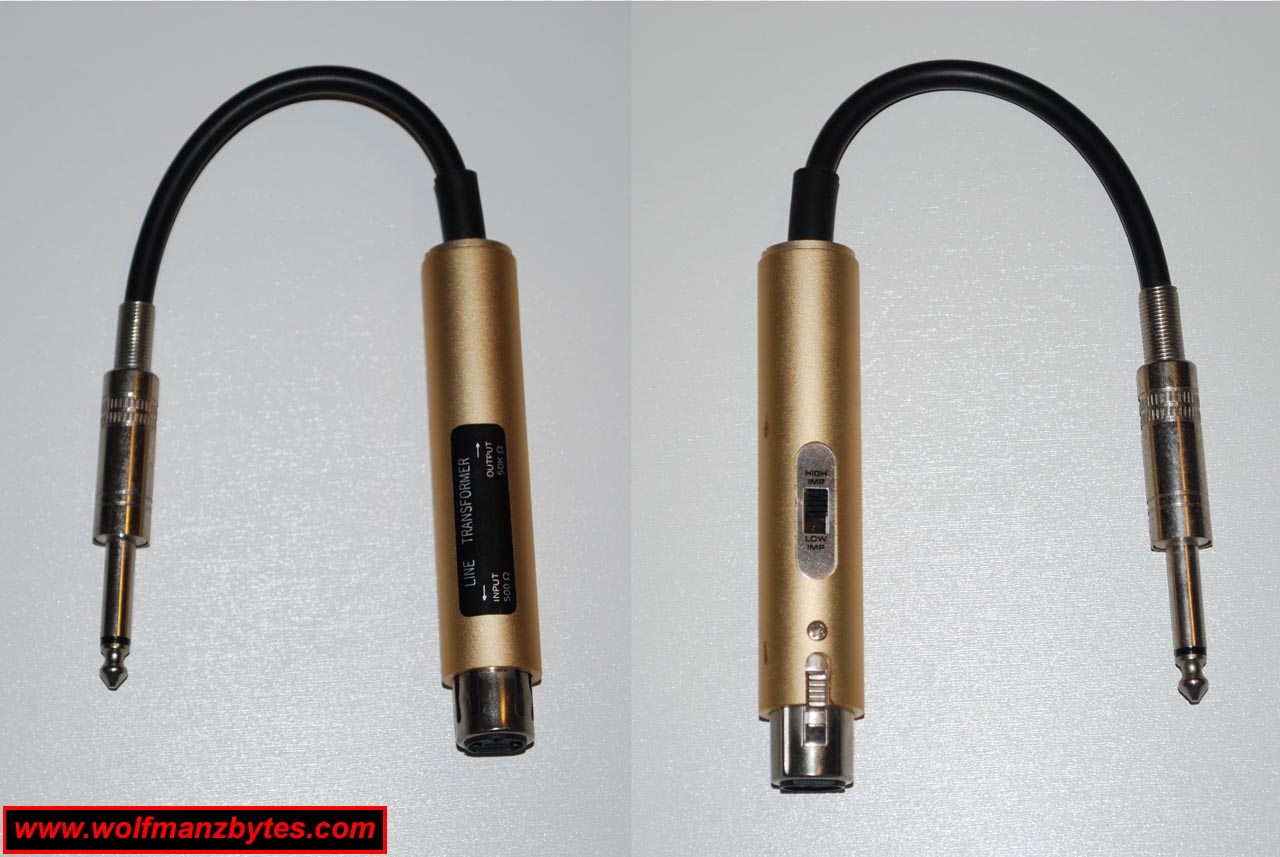
The only other way I know of to make sure your dynamic mic is not fed phantom power is to use a Line Transformer plugged into the quarter inch input instead of using the XLR inputs on the AudioBox USB. As it turns out, the quarter inch inputs on the AudioBox USB are not fed phantom power even if you have it switched on for the XLR inputs. As you can see in the picture below, a Line Transformer will take the XLR mic connection and turn that into a quarter inch plug that you can then plug into the AudioBox USB. The Line Transformer shown in the picture below also has a switch on it that can reduce the mic level or increase it. You should be able to purchase a Line Transformer at any good music store and they run between 20 and 30 dollars.
The only other thing to mention about the AudioBox USB is the highest sampling rate it will do is 48Khz at 24 bit and for some people this maybe an issue.
All of the issues I mentioned above in regards to the pad switches and the phantom power switches are somewhat remedied in the higher end Presonus audio interfaces but, I think Presonus could have really made a bigger dent in the audio interface market had they added the pad switches and had phantom power switches for each input on the AudioBox USB that cost less than $150.00 U.S.
So now that the basics of the hardware have been covered the next thing to look at would be the heart of the whole system and that would be Studio One Artist V2. As shown in the screen shot below, Studio One Artist V2 is certainly a very advanced program with ALOT of features yet still manages to keep itself straight forward and easy to use.
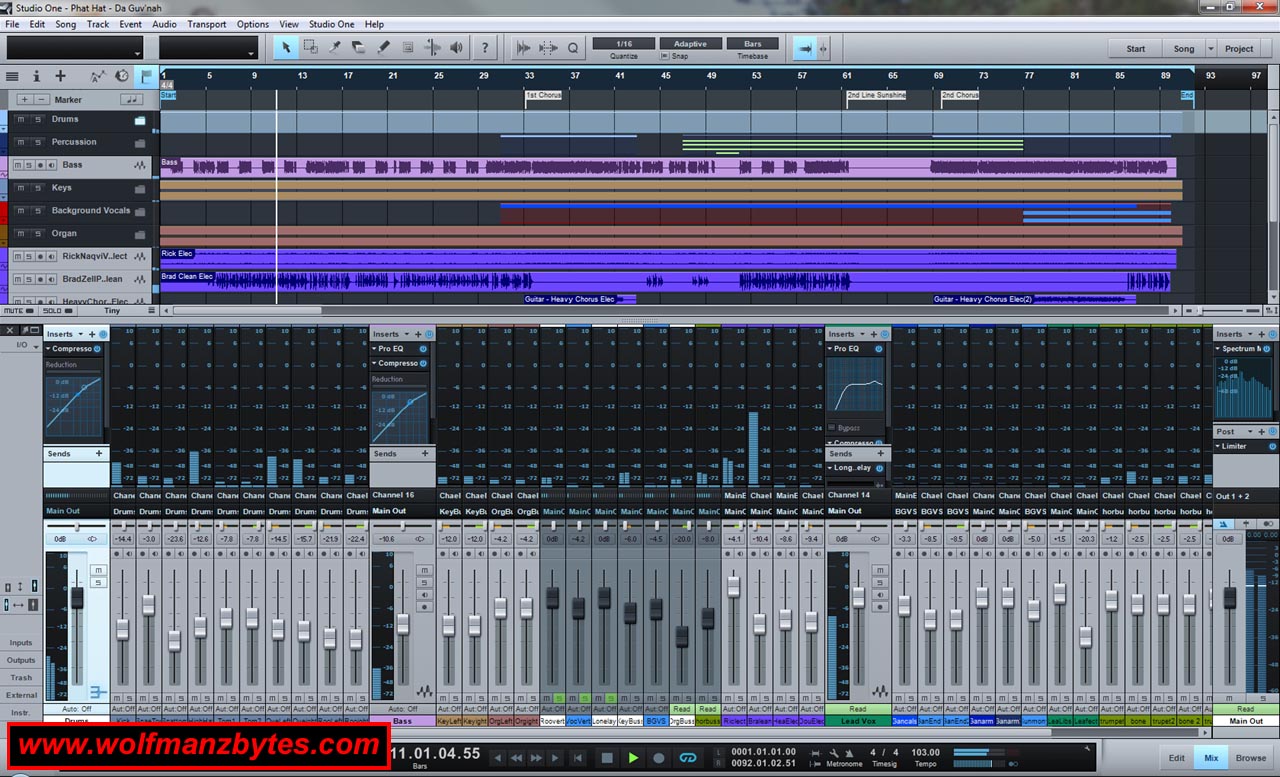
One of the most impressive things about Studio One Artist V2 is the amount of stuff you get, by the time you’re done installing all the software you’re looking at about 20 GigaBytes of hard drive space taken up. You get all kinds of loops and high quality samples that you can then arrange into songs or whatever you like. You also get an impressive array of things like state of the art EQ’s as well as various effect plug-ins and the like. There is so much stuff installed when you install Studio One Artist V2 that it will take you quite a bit of time to go through the vast sound libraries and plug-ins to see what all is there.
Aside from what’s installed the other thing I like about Studio One Artist V2 is the fact it has a very clean interface and the program can run loads of audio tracks and not bog my system down in the least. What’s interesting is that there are a few demo songs that get installed when you install Studio One Artist V2 and these songs have loads of tracks and use all sorts of the default plug-ins and despite that my CPU was only at about 25% load when playing the various songs.
Some programs I have tried in the past weren’t very good when it come to CPU performance once you started to activate a lot of plug-ins and that was always something that got on my nerves.
Something else worth mentioning here is that if you want to learn the various aspects of Studio One Artist V2 the best place to go is youtube and look for studio one videos. There are a ton of user made videos that cover most of the important aspects of studio one and the Presonus youtube channel also covers a lot of the features of studio one as well.
Despite the fact that Studio One Artist V2 is a powerful application it does come with some very big limitations and they are the following.
First up, Studio One Artist V2 does not have any way to import or export .MP3 files and this is something I really find annoying to say the least. Years ago now I went out and purchased Steinberg’s Cubase 4 essentials and after blowing 200 dollars on the program I was amazed to find out that it too couldn’t export to .MP3 files unless you went out and purchased that functionality separately from Steinberg and that really pissed me off to no end, so this limitation doesn’t sit well with me when it comes to Studio One Artist V2.
It should be noted that despite the fact you can’t import or export .MP3 files with Studio One Artist V2 you can import and export .WAV files and so if you have a program like Audacity that has the Lame MP3 encoder installed you could take the .WAV file and use Audacity to convert the .WAV to .MP3. Audacity is a free Audio Editor and you can find more info about it here.
The next big limitation with Studio One Artist V2 is the fact it does not support AU, VST2, VST3 plug-ins. The Studio One Artist V2 built in VST’s work fine but it will not see any other 3rd party VST”s on your computer and for some people this fact alone may make you upgrade to Studio One Producer or Professional to get that functionality.
For those of you who rely on the ReWire protocol for programs like Reason, you will also not be able to use those programs with Studio One Artist V2 since it doesn’t support ReWire and you have to upgrade to the next version of Studio One Producer or Professional to get that functionality as well.
While on the topic of software limitations the one thing Presonus did not limit was the amount of tracks you could record in Studio One Artist V2. Basically Studio One Artist V2 will record as many tracks as your computer hardware will allow.
So, there is some good news here when it comes to all these limitations and that is, you can get rid of them if you upgrade from Studio One Artist V2 to Studio One Producer V2 and that upgrade costs about $99.00 U.S. Should you want to skip the Studio One Producer V2 upgrade and go right to Studio One Professional V2 that will cost about $299.00 U.S. Studio One Professional V2 is the top of the line program and that includes everything that Producer version includes plus you get a mastering section, more plug-ins plus things like soudcloud support as well as QuickTime video playback and sync. For a more complete list of Studio One versions / features and pricing see the Presonus website here.
I would imagine that most people purchasing an interface like the AudioBox USB will be doing so to record various types of music and what not but what shouldn’t be under estimated is how great the AudioBox USB and the Studio One Artist V2 are for things like podcasting. Prior to Studio One Artist V2 showing up I use to use Audacity to record the podcasts that I do for this web site however, after messing around with Studio One Artist V2 I think I may move to it for recording future podcasts and here’s why.
When I used to record the podcasts using Audacity there was a whole process I would go through. First you would record the podcast and once that was done you would do your basic editing to get rid of dead spots and the like but the real work started when you would use the compressor in Audacity to adjust the levels. Depending on how close you were to the mic and the overall sound you wanted you would be messing around with the Audacity compressor for quite a bit and then after you did that you had to check and make sure you had no clipping and none of this stuff is done in real time, you have to apply the effect to see if you like the result and then decide to keep it or redo it.
With Studio One Artist V2 you can setup a template specifically for podcasting if you wish and that template might have your single audio track and then on that track you have a noise gate to kill any minor background noise and then a EQ to get the sound your after. On the main mixer out you can put the compressor on that channel and then after that you put the limiter on the channel to prevent clipping and you’re done.
I was super impressed with the way Studio One Artist V2 handled this type of setup and in the end the audio file sounded a lot better than the one I would produce when using Audacity and that’s not a slam against Audacity in any way, it’s just a lot easier to get the sound you want when you can adjust things like an EQ and compressor in real time and hear the final result while listening to the audio. Now if only Studio One Artist V2 had a way to export to .MP3 this would be a perfect podcasting setup and you wouldn’t need any external programs to complete the job.
In conclusion I think the Presonus AudioBox 2 X 2 USB Recording System is a pretty good deal for the money. It’s not perfect by any means but, it is a good sounding interface that comes with top notch software that gives the end user a lot of power despite the limitations mentioned above. I have been testing the AudioBox USB for months now and it has worked flawlessly with all the different audio applications I’ve thrown at it. Another plus of the AudioBox USB is unlike the M-audio Fast Track Pro you don’t have to crank the gain of the inputs to full in order to get good levels with say an electric guitar. I keep the input gain for my telecaster at just a sliver over the half way mark on the gain dial and with that I have lots of volume on the guitar when using programs like Studio One Artist V2 or other programs like Amplitube 3.
Speaking of input gain, It is important to note one thing and that is, some AudioBox USB users have claimed that the inputs are simply too hot in terms of levels and I could see how that could be an issue for some specially with lack of pad switches on the inputs but for me I had no issues when using my telecaster and a SM58 Mic in terms of levels being too hot while plugged directly into the AudioBox USB.
At the time of this Review you could purchase the Presonus AudioBox 2 X 2 USB Recording System for about $149.95 U.S.
